

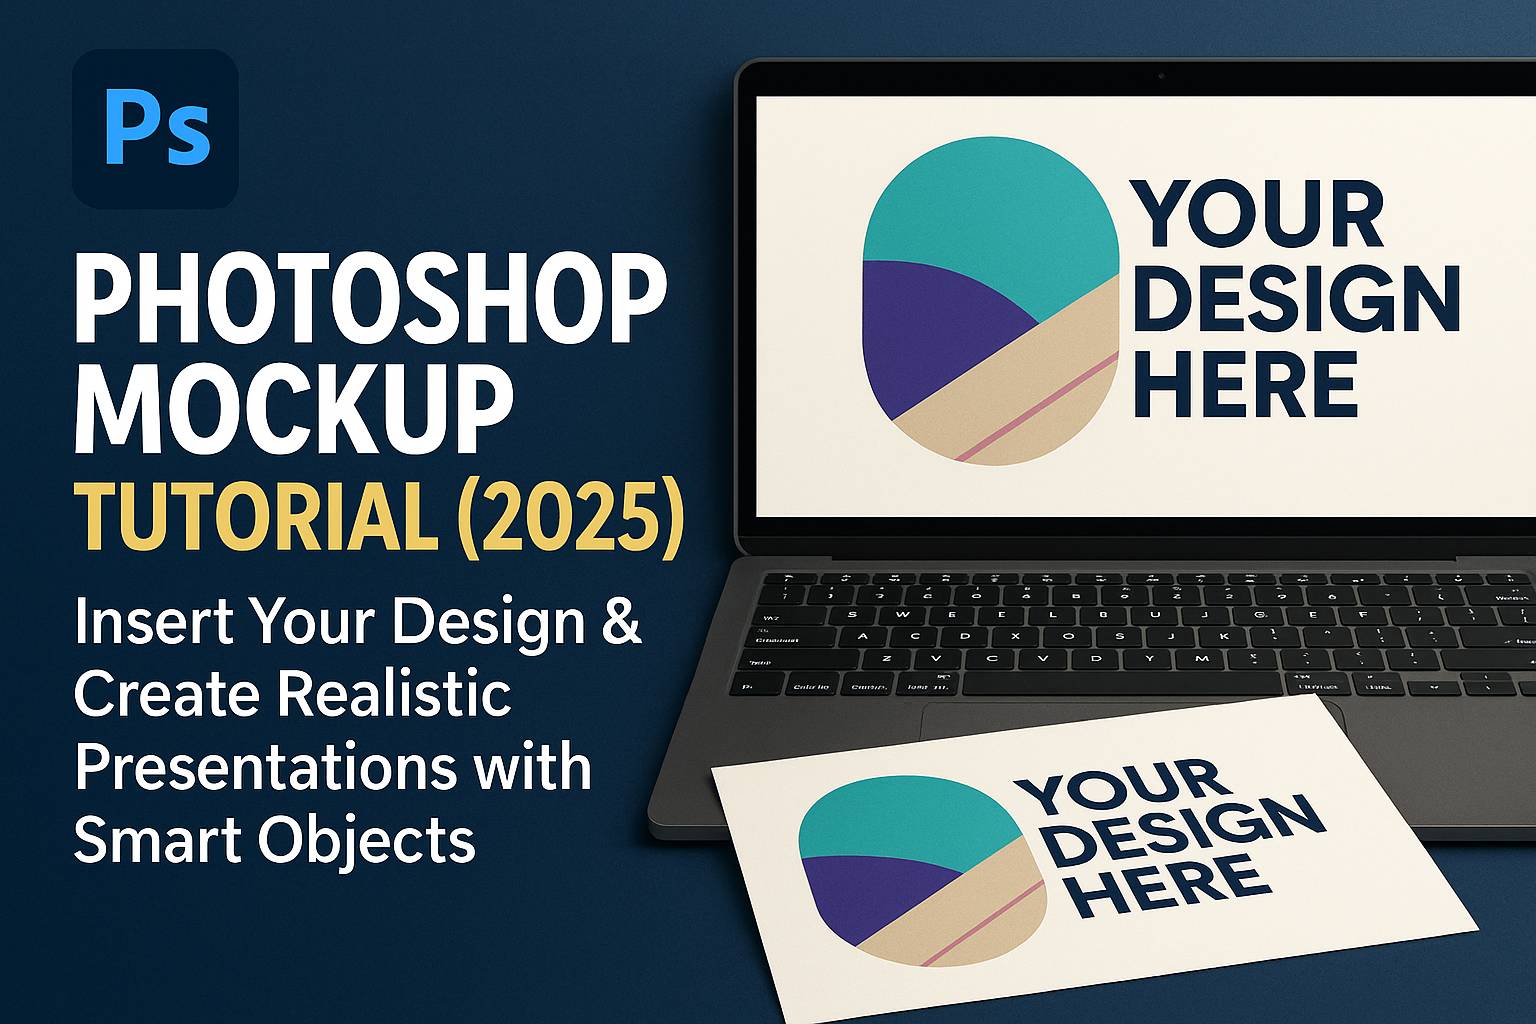
I. Introduction
Mockups are an essential part of presenting your design work in a polished, professional way. Whether you’re showcasing a logo, app interface, product packaging, or t-shirt graphic, Photoshop allows you to place your designs into real-world environments with realism and flexibility.
In this tutorial, you’ll learn:
- How to use a premade mockup PSD file
- How to create your own reusable mockup from scratch
- How to use Smart Objects, warping, and blending modes for realism
- How to export and present your mockup design professionally
II. What You’ll Need
- Adobe Photoshop (2022 or later recommended)
- A premade mockup PSD (optional)
- Your design file (logo, label, UI screenshot, etc.)
- A high-resolution product photo if you want to create your own mockup
[Download our Free Mockup Starter Pack to follow along]
III. Using a Premade Mockup (Smart Object Workflow)
Step 1: Open the PSD Mockup
- Locate the layer labeled something like “Your Design Here” or “Replace Me”
- It’s usually a Smart Object layer
Step 2: Open the Smart Object
- Double-click the Smart Object thumbnail
- A new .PSB file opens in a separate window
Step 3: Insert Your Design
- Paste your design into the Smart Object file
- Resize and align as needed
- Hide or delete the placeholder content
Step 4: Save and Return
- Press
Ctrl/Cmd + Sto save - Return to the main PSD—you’ll see your design automatically applied in context
Optional Enhancements:
- Adjust Opacity and Blend Modes for integration
- Add Adjustment Layers (e.g., Hue/Saturation, Levels)
- Add or refine Shadows using brush layers
IV. Creating a Custom Mockup from Scratch
Example: Create a T-Shirt Mockup
Step 1: Import a Product Photo
- Use a high-quality, well-lit photo of the item (e.g., blank t-shirt, tote bag)
Step 2: Add Your Design
- Paste in your logo or graphic
- Convert to Smart Object for future replacement
Step 3: Resize and Position
- Use Free Transform (Ctrl/Cmd + T) to fit the artwork onto the product
Step 4: Warp the Design
- Right-click the Smart Object > Warp
- Gently bend the corners or edges to follow fabric folds or surface contours
Step 5: Blend with the Surface
- Change blend mode to Multiply or Overlay for better realism
- Add a duplicate layer set to Soft Light for highlight depth
- Add a shadow layer with a soft black brush beneath the design
V. Exporting the Mockup
For Sharing or Web:
- File > Export > Export As > JPEG or PNG
- Use 72 PPI for web resolution
For Print:
- File > Save As > TIFF or high-res PDF
- 300 PPI, CMYK color mode
Keep Editable:
- Save a copy as PSD with Smart Objects and adjustment layers intact
VI. Tips for Better Mockups
- Always use high-res product photos (2000 px or larger)
- Keep your Smart Objects clean and centered
- Use Perspective Warp for angled surfaces
- Add light texture overlays (e.g., fabric grain, paper) for realism
- Name your layers clearly (Design Layer, Shadow, Background)
VII. Common Use Cases for Mockups
- Logo on t-shirts, mugs, signs
- Business cards or letterheads
- App UI on phone, tablet, or laptop screens
- Product packaging (box, bag, bottle)
- Posters and advertising boards
VIII. Downloadable Resources
- Free PSD mockup with editable Smart Object
- Texture overlay pack (paper, fabric, wood)
- Logo and UI template for practice
[Click to Download the Mockup Starter Kit]
IX. Conclusion & What to Learn Next
Mockups help transform flat designs into realistic, presentable assets for portfolios, clients, or promotional content. Once you’ve mastered Smart Objects, warping, and blending modes, you can apply your work across unlimited surfaces with consistency and quality.
Next tutorials to explore:
- [Smart Object Essentials in Photoshop]
- [How to Create a Logo with Transparent Background]
- [Apply Textures and Shadows for Realistic Design Presentation]
Tag your mockups with #FLVMockupMastery to get featured!
X. FAQ
Q: What is a Smart Object and why is it used in mockups?
A: A Smart Object is a layer that contains image data from a separate file. It allows you to edit content non-destructively and auto-updates across the mockup.
Q: Can I change my design later?
A: Yes—just double-click the Smart Object, replace the artwork, and save.
Q: Do I need a premade PSD mockup?
A: No. You can create your own from a good photo by adding Smart Objects and blending manually.
Q: What’s the best export format for mockups?
A: PNG for web (transparent), JPEG for social sharing, TIFF/PDF for print.
Once you know how to build and use mockups in Photoshop, you’ll elevate the presentation of your designs—and impress every client or viewer with visuals that feel real.